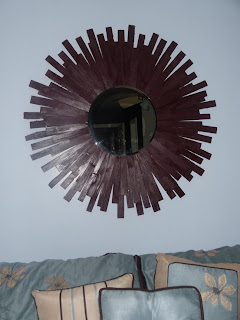
But, this is the project that started it all. This just caught my attention somewhere out there in cyberspace and it seemed simple enough- and I had been looking FOREVER for something to go in the big space above our bed. And seriously, the cost of this guy was a whooping $15 and just a couple of hours.
This guy here has a regular price of $239, but that's ridiculous. Thank goodness that it's on sale for $198! Did I mention that I made mine for under $20?!?
This was my inspiration piece from JandJ Home. She left the wood on hers unfinished. I like that look, but it would totally clash with our bedroom. I just used some extra spray paint I already had and it looks great in our space.
She explains the steps well and I followed her instructions right on, so I'm not going to post them again. I really suggest that you do! I really want to make one for my sister's college apartment-- it would look great above their couch, but there isn't anyway to hang it because they can't put holes in the wall.
My thoughts on the project.
Purchase the 2 Wooden rings (on the back) and mirror are from Michaels-- one at a time, use a 40% off each time. These coupons are everywhere and you generally get one on your receipt to use towards a future purchase.
This uses A TON of glue sticks. I had a little almost a half a bag, but I ended up running out. I hate having to stop on a project for something like that. {I did mess up, so I had to tear off the first layer and start over, which didn't help my glue stick supply situation.}
I've seen projects like this where people have used paint sticks or rulers, but I'm convinced that using wooden shims are the way to go because of it's wedge properties. The middle, where you glue and hang your mirror, isn't as bulky as the outer edges because the sticks get wider as they go out. It just lays better and looks better. And wood shims are super cheap {especially when your dad has buckets of them lying around his work shed}.
Make sure to use wood glue to attach the mirror to the sunburst. Hot glue will not do the trick.
Here are some more pictures.
The great thing about this project, aside from it being super cheap to make such a large piece, is that it isn't a pristine finished product. It looks best when you use all of the shims in a package, even if one isn't as pretty as the rest. It adds to the natural aspect of the project-- plus, it offers a little grace while putting it together!
Have questions?? Be sure to ask!


It looks amazing. I love the color of the shims. Thanks for the link back!
ReplyDelete